 |
 |
|---|---|
| • | Ex 2.2: Area, Line and Point Annotations |
2. Navigation, Annotations and Measurements
In this section you will learn
- how to create annotations and modify their properties
- about the different annotation types
- how to create a hierachy of annotations
- how to make measurements of annotations
- how to use the magic wand tool
- how to classify annotations
- how to split annotations
2.1 Creating an annotation and setting its properties
Aims:
- Create an annotation
- Set its name, description and color
- Modify the global display options for annotatins
2.1.1 Create a rectangular annotation
Open an image and switch to the annotations-tab. Select the rectangle tool from the toolbar and make a rectangular annotation somewhere on the image.

Fig. 2.1.1 – The annotations toolbar.
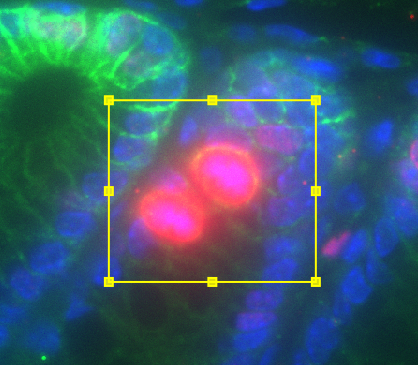
Fig. 2.1.2 – A rectangular annotation.
2.1.2 Set the properties of the annotation
Use Set properties from the context menu of the annotation to
- set the name
- set the description
- change its color
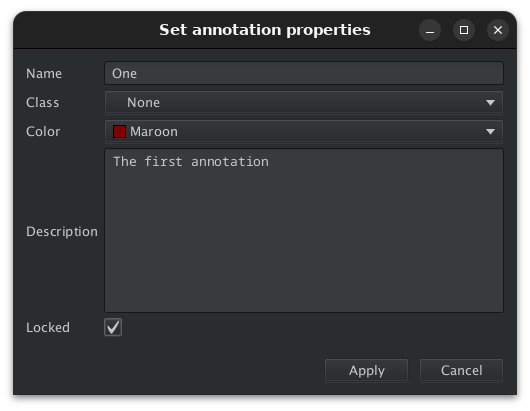
Fig. 2.1.3 – The dialog to set the annotation properties.
Note
Note that the color will only become visible when the annotation is not selected anymore.
2.1.3 Modify the global display of annotations
Activate and deactivate the buttons: ![]() ,
, ![]() and
and ![]() . What effect do they have on the annotations?
. What effect do they have on the annotations?