1. Project Creation
The first step if you want to work with QuPath is to create a new project. A project bundles the files belonging together:
- Paths to the input images
- Annotations
- Detections
- Classifiers
- Scripts
- Measurements
When you create a new project you have to provide an empty folder, into which the project files will be saved.
Importing Images
The next step, after the creation of the project, is to import images. When importing images, you need to answer some questions.
Note
The images will not be copied into the project. The project will merely save the paths to the images in the file system.

Fig. 1.1 – Options when importing images into a project.
- Image Server
- Selet the software that will be used to read the images and its metadata. The possible choices are Default (let QuPath decide), JSON server, ImageJ, Bio-Formats and OpenSlide. If you select
Default, QuPath will decide on its own which software to use for the given images.JSON serverallows to read the metadata and the software to be used from a file previously saved by QuPath. Once the image impported you will find the filesserver.jsonin the subfolders of the folderdatain your project folder. - Set Image Type
- If the image is a
Brightfieldimage QuPath will apply a color-deconvolution to the image. If you chooseH&EorH-Dab, Qupath will use the predifined color vectors for these stainings - Auto-generate pyramids
- If the image is big and not already pyramidal, QuPath will create a resolution pyramid.
- Import Objects
- Objects created with a different software and stored in the image will be imported as annotations into QuPath, for example ROIs created with FIJI/ImageJ
Fluorescence vs. Brightfield
In fluorescence microscopy fluophores are tagged to the molecules or structures of interest. The fluophores emit photons of a specific wavelength when stimulated by a laser with a specific wavelength. These photons are counted over a time interval and converted into intensity values. For each fluophore an independent image is saved as one channel of the whole acquisition. The images have high values for the signal and values close to zero when no signal is present.
In brightfield microscopy molecules or structures of interest are stained with a dye of a specific color to obtain a better contrast for the objects of interest. An image with an RGB camera is then taken. The colors of the different stainings are not saved independently, but are recorded as rgb-values in the image. Higher concentrations of staining let pass less light. A darker color therefore means a higher signal and empty regions result in a zone with a color close to white.
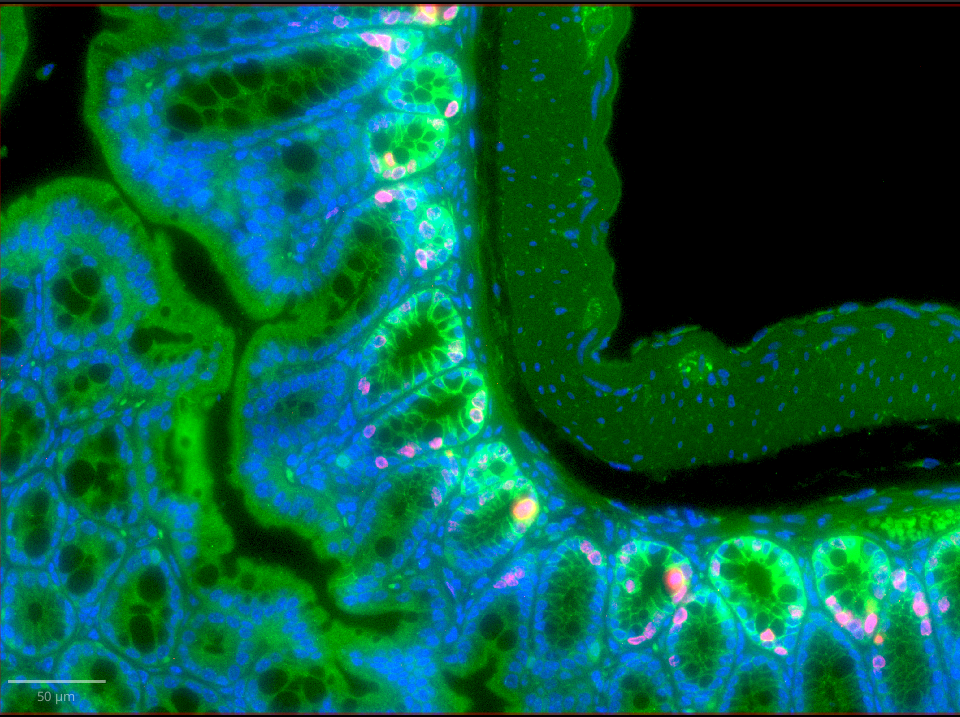
Fig. 1.2 – A 3-channel image from fluorescence microscopy.
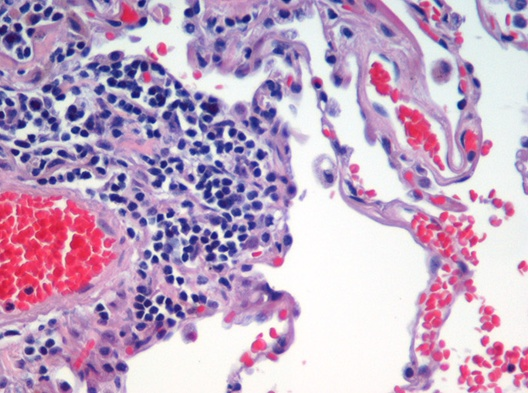
Fig. 1.3 – A brighfield image.
The Image pyramid
Whole slide images can be big. They can be so big that they do not fit into the working memory of the computer. However the information of the whole image is rarely needed all at once. When watching the image with a small zoom, a large area is visible but only a small resolution is needed. When zooming in, a larger resolution is needed but only of a smaller area. To optimize the speed of the access to the different resolutions images with smaller resolutions are precalculate and stored on the disc. These form the image pyramid.
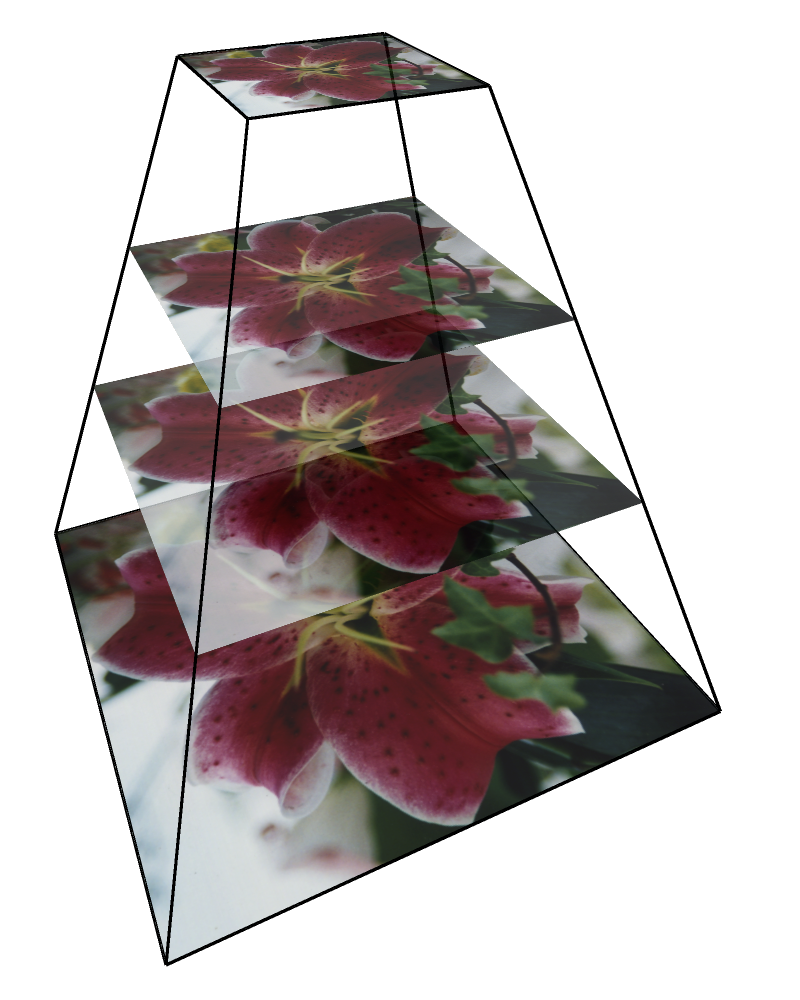
Fig. 1.4 – The image pyramid.
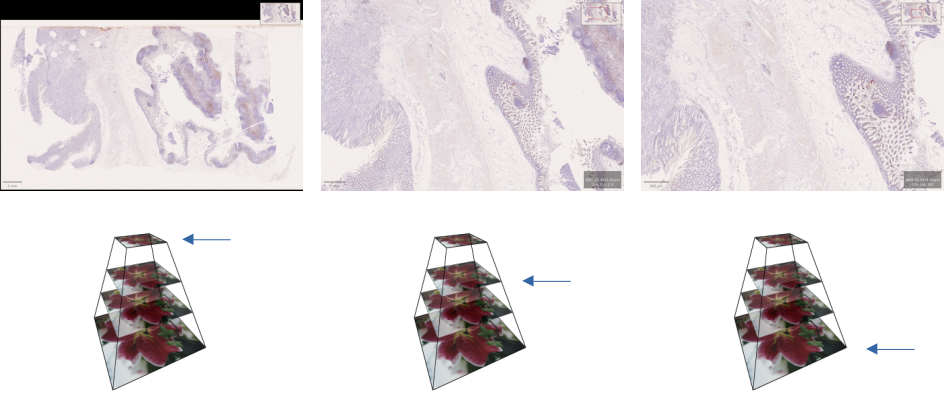
Fig. 1.5 – Display zoom and image pyramid.
The project view
The project view consists of the name of the project and a list of images. A right-click on the project name opens a context menu. You can change the size of the thumbnails and sort the images by different metadata fields. You can also add new key, value pairs and sort by the newley created metadata field.
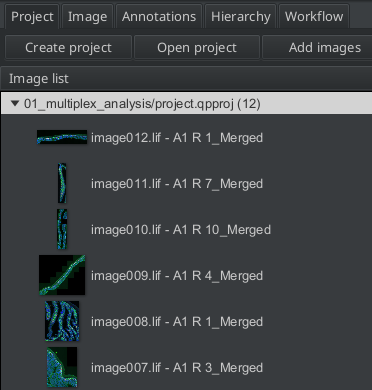
Fig. 1.6 – The project view.
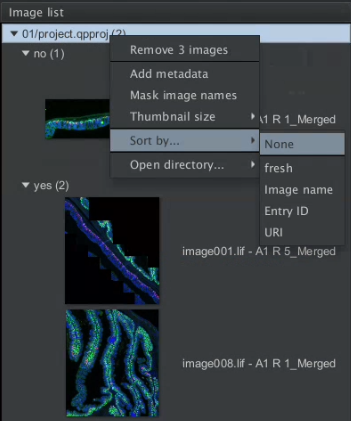
Fig. 1.7 – The image list of the project.
The project folder
The files belonging to the project are saved under the project folder.
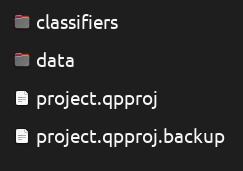
Fig. 1.8 – The content of the project folder.
The imported input images are not copied into the project folder. The project stores the image metadata and the paths to the images in the local filesystem in the project file with the extension .qpproj. The backup of the project-file is the version of the project file before the last change. If something goes wrong you can go back to the previous version by replacing the project file with the backup file.
Sharing projects
To share your project with someone else, you can zip the project-folder and send it to someone. You need to share the images seperately. On the new machine the paths will be different. QUPath will not find the images anymore when the shared project is opened. In that case QuPath will show a dialog, that allows you to select the folder containing the images now.
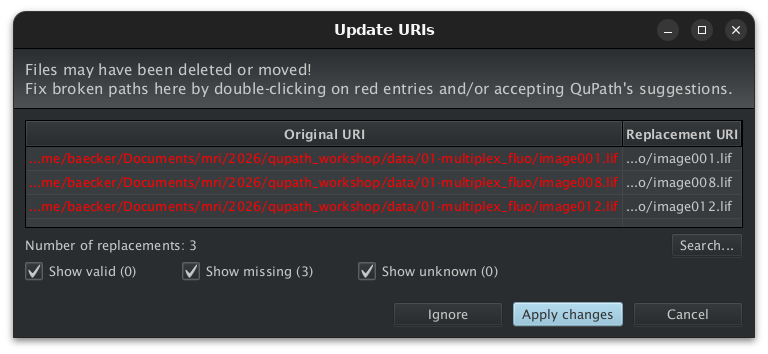
Fig. 1.9 – Fixing image paths after the project has been moved.