3D spot colocalization
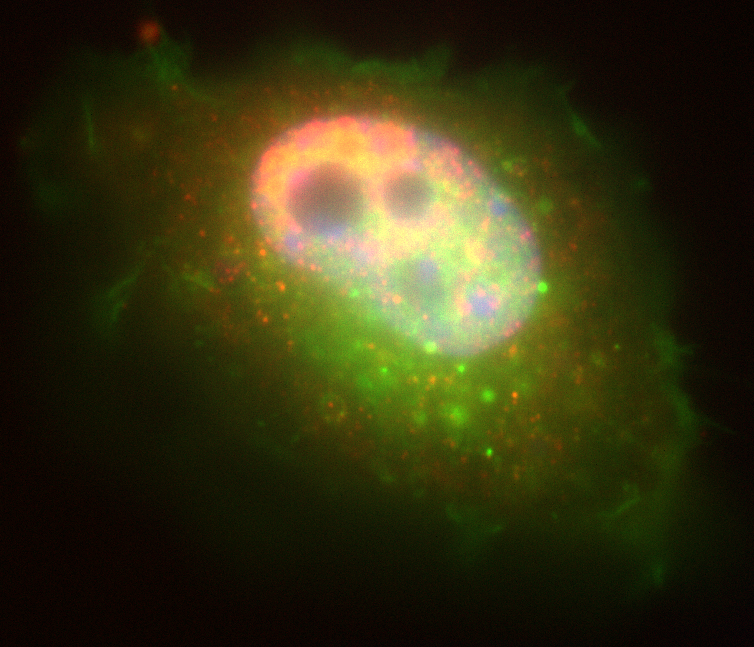
- input:
- 2 spot channels +
nuclei channel
- 2 spot channels +
- objectif:
- for spots not within
the nucleus, calculate
the shortest distances
between spots in
channel one and
channel two
- for spots not within
Napari
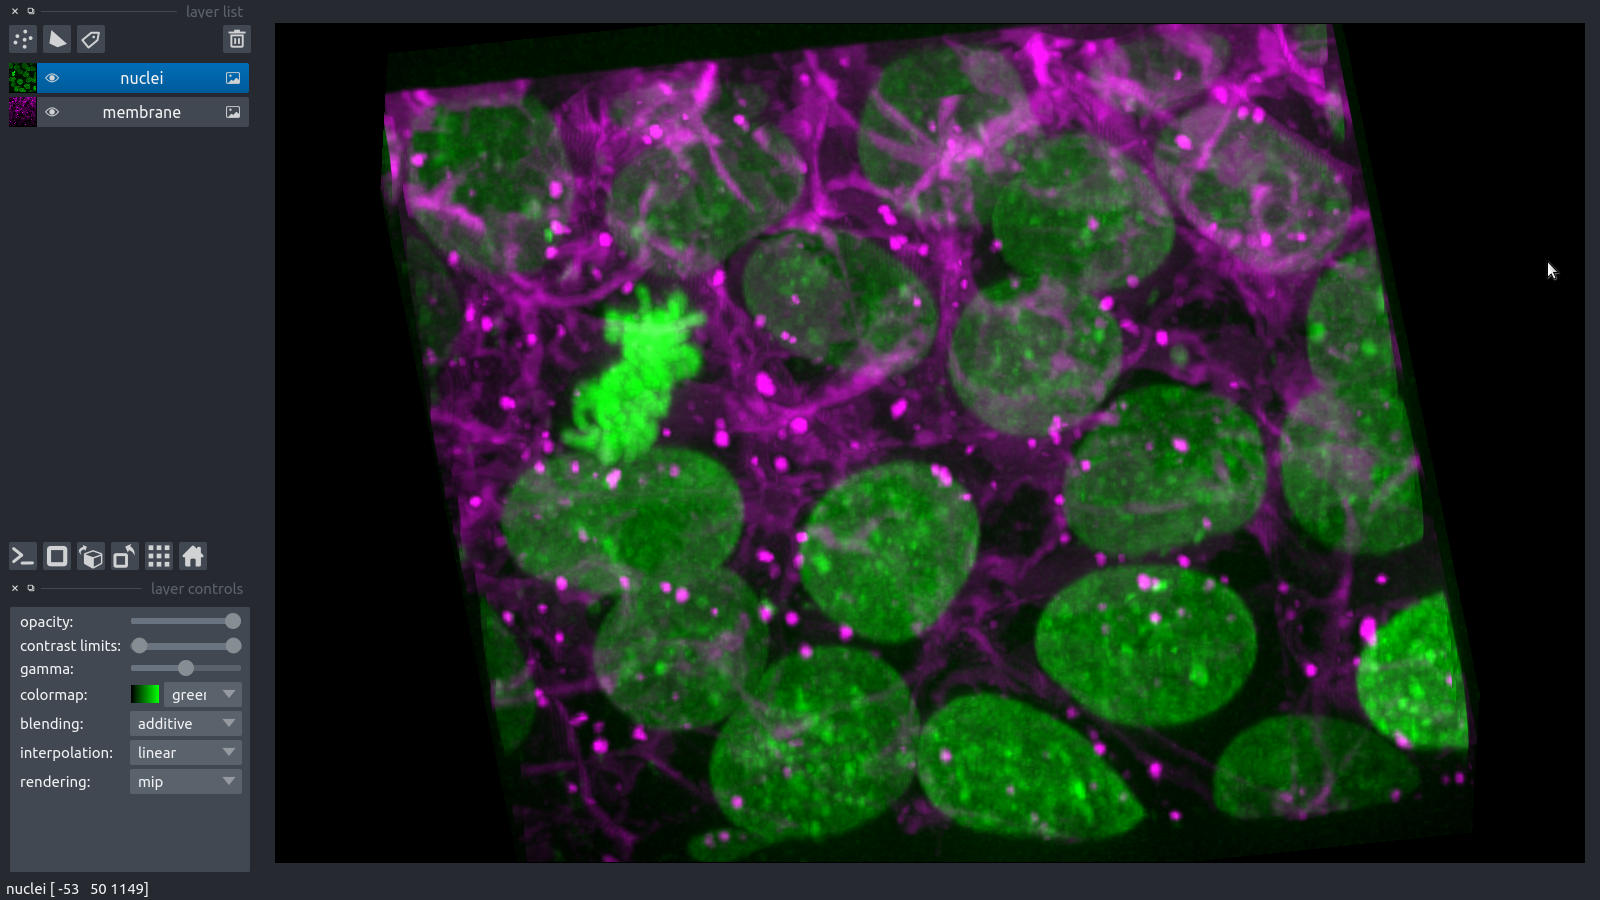
- 3D viewer
- dimensions z, t , … (sliders)
- image layers c
- point, labels, shape layers with gui tools
- surface, track, vector layers via python code
- plugins (widgets or hooks (for example load/save))
- data is an array like python object
- can use dask arrays and zarr-files
- read big data / read remote data
- can use dask arrays and zarr-files
Napari plugins
- plugin can be registered
- registered plugins can be installed from within napari
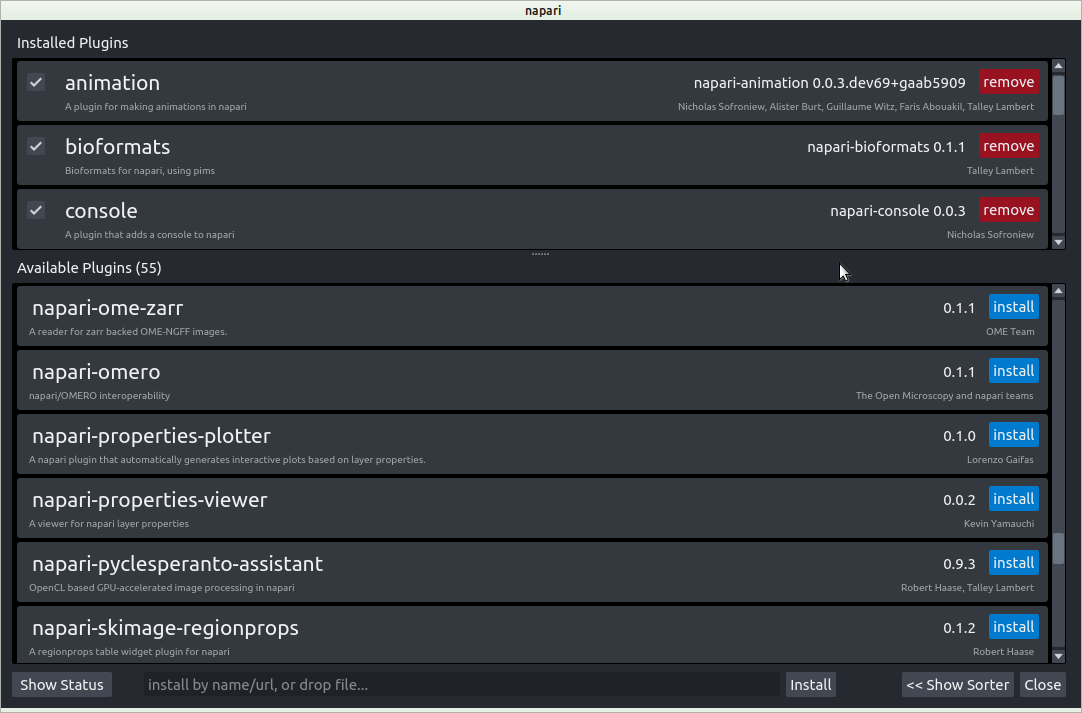
Napari animation plugin

The ImageJ-python bridge
- Connect ImageJ and python both ways
- Use jpype to start the jvm
- call java from python
- shared memory
- no copying of data
- Use the jupyter-client
- send commands from IJ to the ipython kernel
- the one that started the jvm
- send commands from IJ to the ipython kernel
Example python accessing IJ
data = getResulsTable()
display(data)
cal = IJ.getImage().getCalibration()
coords = np.delete(data.values,[3], axis=1)
icoords = [[z, y, x] for [x,y,z] in coords]
zFactor = cal.getZ(1) / cal.getX(1)
points_layer = viewer.add_points(icoords, size=1, scale=[zFactor, 1, 1])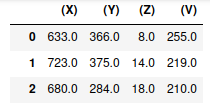
Example IJ accessing python
from ijpb.fiji.IPythonProxy import IPythonProxy
p = IPythonProxy()
p.run("import napari")
p.run("from PyQt5 import QtCore")
p.run("viewer = napari.Viewer()")
p.disconnect()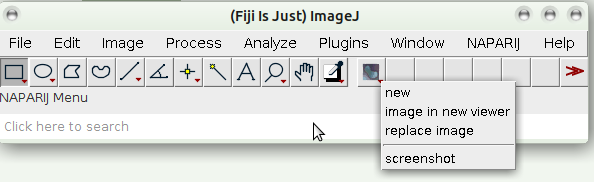
The naparij-plugin
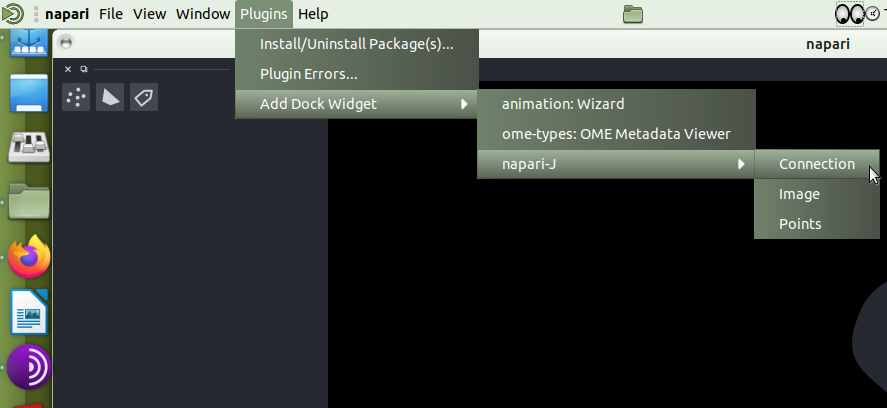
Connection
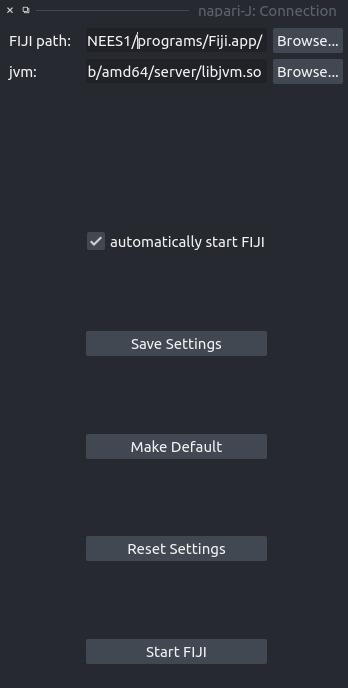
- start the jvm
- set
jupter_connection_file
andpython_executablein IJ- so that the IPython proxy can connect back
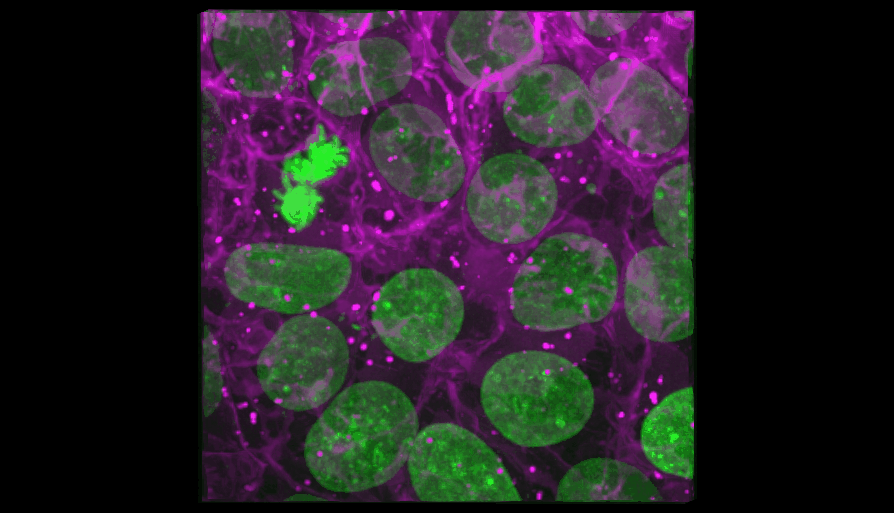
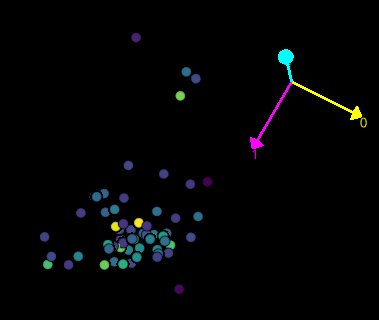
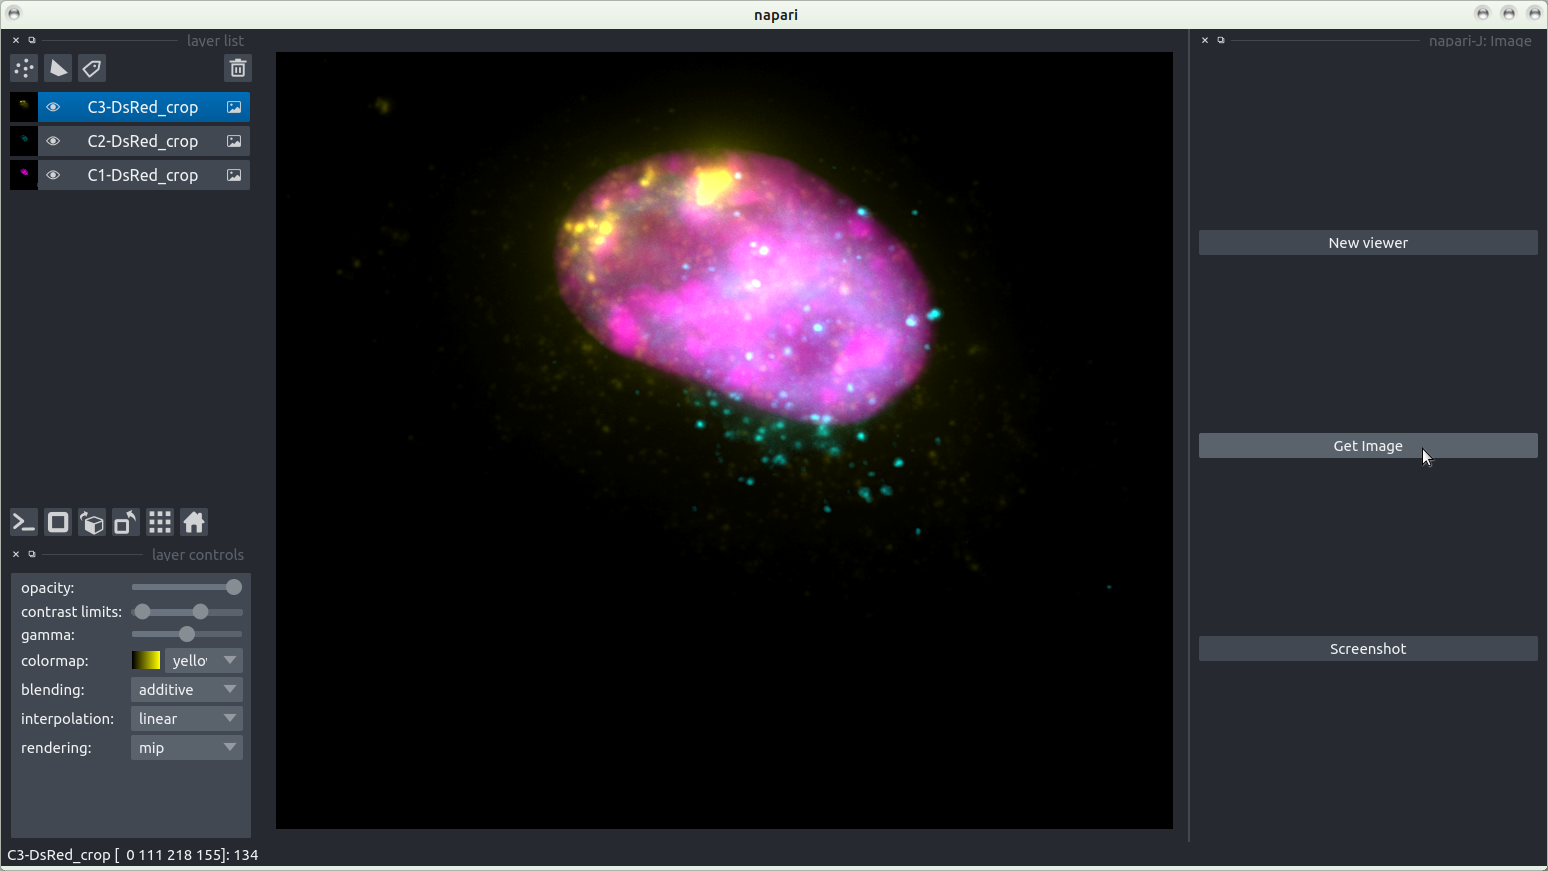
Image
Points
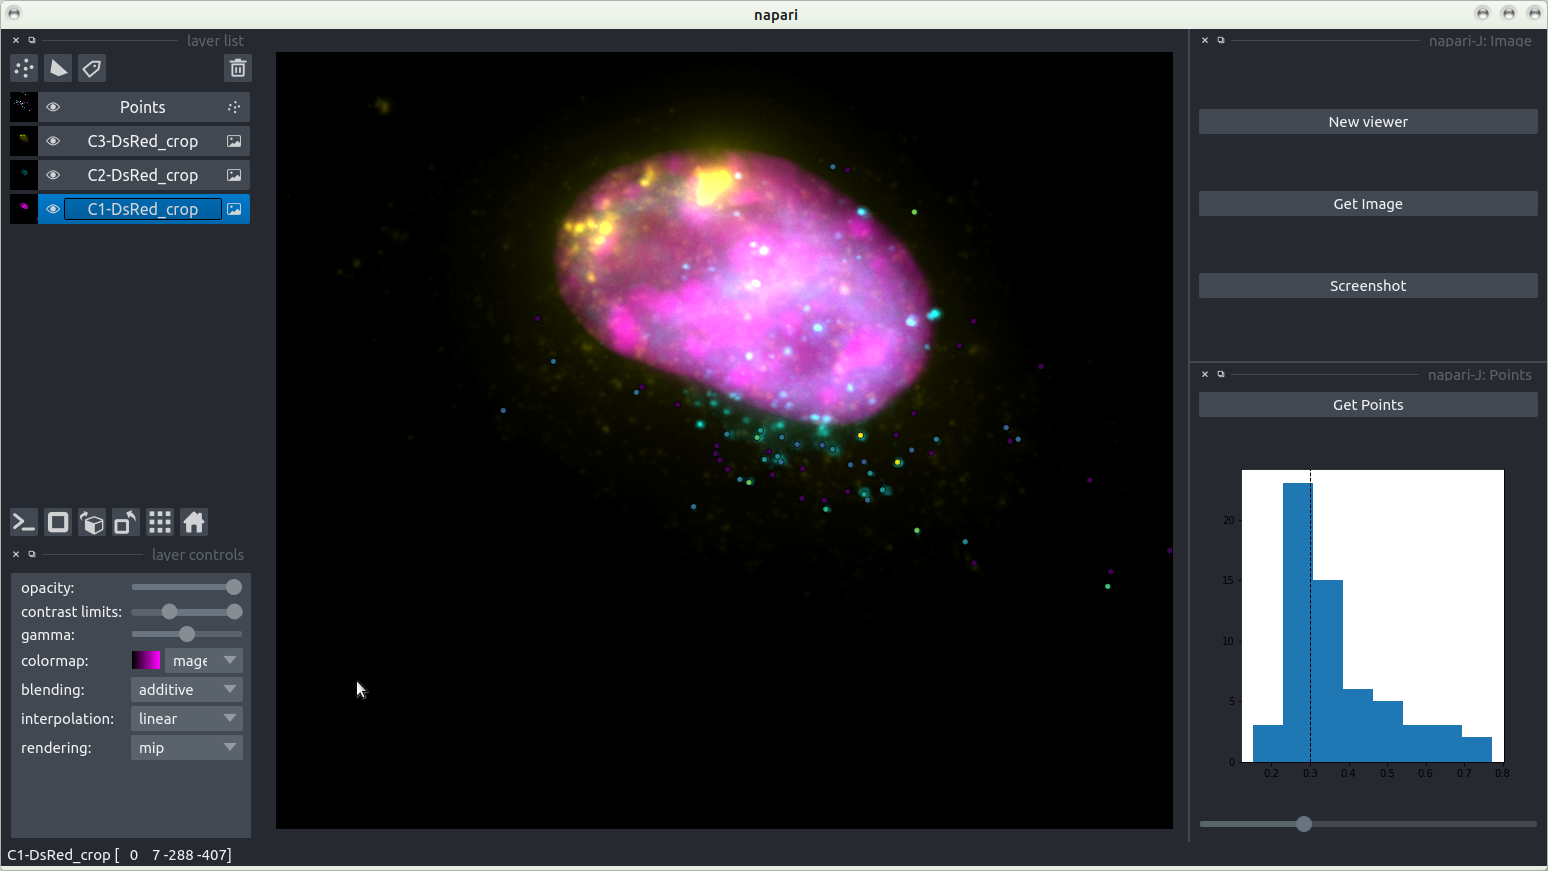
Points (zoom)