How to use “Napari Tree Rings” widget?
1. Get your data ready
- The Napari plugin expects your data to respect a precise format:
The images must be available as dissociated TIF images (no jpg, no 3D stack, no video, …).
The plugin only accept images in 2D grayscale (Y, X) or 2D RGB (Y, X, 3).
In the case of running batch, all the images that you want to process must be in the same folder.
Avoid using special characters in the folder’s name. (Tips: Doranum)
Both models used by this plugin were trained on images with the size ranging from 2000x2000 to 10000x10000 pixels, you may have troubles if your images out of this size.
.
├── 📁 my-awesome-experiment
│   ├── some-image.tif
│   ├── another-image.tif
│   ├── ...
│   └── last-image.tif
2. Workflow
a. Import your images
In this section, you will import your experiment so you can visualize and analyze it.
Open the plugin via Plugins > Segment Trunk (Napari Tree Rings).
For running only one image, you just have to drag and drop that image into the interface.
For running batch, press the
Browsebutton at theSourcein theBatch Segment Trunktag and choose the path to the foloder containing your images. It is the path of “my-awesome-experiment” in the previous example.You can adjust the contrast and brightness in the upper-left corner of Napari.
If your image doesn’t appear in the viewer anymore, or if it becomes too small, you can click on the little “Home” button in the lower-left corner of Napari to center the view.
b. Segment the tree rings (Segmentation)
If you would like to change the default configurations before the segmentation, click on the ⚙ button:
Options of |
Setting |
Description |
|---|---|---|
Segment Trunk |
Scale Factor |
Controls how much your image is scaled down before processing (default is 8). |
Opening radius |
The size (in pixels) of the structuring element used in the opening operation, which removes small objects and smooths boundaries in the image (default is 96). |
|
Segment Rings |
Method |
Choose framework as Attention UNet or INBD (Gillert et al., 2023). The below configurations are only used for Attention UNet. |
Ring model |
Choose model for segmenting tree ring boundaries. |
|
Pith model |
Choose model for segmenting pith. |
|
Patch size |
Image will be cropped into smaller patches to ensure computational cost. The default is 256, since it is the size we used to train our models. |
|
Overlap |
The proportion of length shared between adjacent image tiles to ensure smooth transitions and avoid edge artifacts. The default is 60. |
|
Batch size |
The number of tiles processed together in a single iteration. The default is 8. |
|
Rescale Factor |
Controls how much your image is scaled down before post-processing (default is 5). |
|
Heuristic function |
Choose the heuristic function applied in the post-processing of A-star algorithm. Default is H0. |
You have to click the
Savebutton to save the new configurations.- For running only one image:
You can choose the output folder (to export CSV file) by pressing the
Browsebutton at theOutputin theSegment Ringstag.You can just click the
Runbutton inSegment Ringstag to start the segmentation.The segmentation result will overlay on the original image.
The extracted measures will appear in the lower-left box, and automatically saved in the chosen output folder.
- For running batch:
Press the
Browsebutton at theOutputin theBatch Segment Trunktag.You can just click the
Run Batchbutton inBatch Segment Trunktag to start the batch segmentation.The extracted measures will automatically saved in the chosen output folder, along with the coordinates of the detected boundary points.
The first time, the models will have to be downloaded from internet.
C. Extract measures (Measures)
The exported CSV files will be extracted at the end of the process.
For running one image, there is only one CSV file exported at the chosen output folder, containing necessary measuremnts (except
area_growth).- For running batch, each image will have three exported CSV files:
{imageName}.csv: containing the coordinates of bark boundary
{imageName}_rings.csv: containing the coordinates of ring and pith boundaries.
{imageName}_table.csv: containing the necessary measurements.
3. Examples of processed data
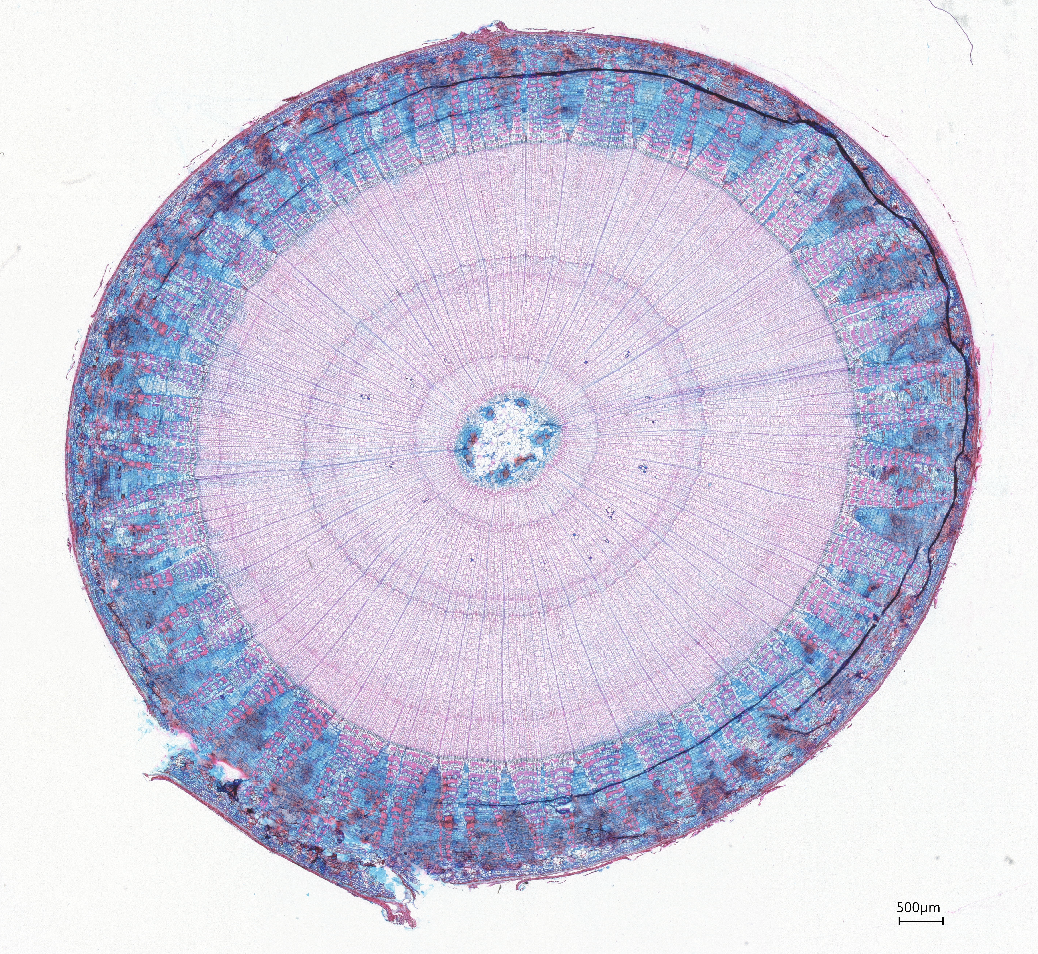
|
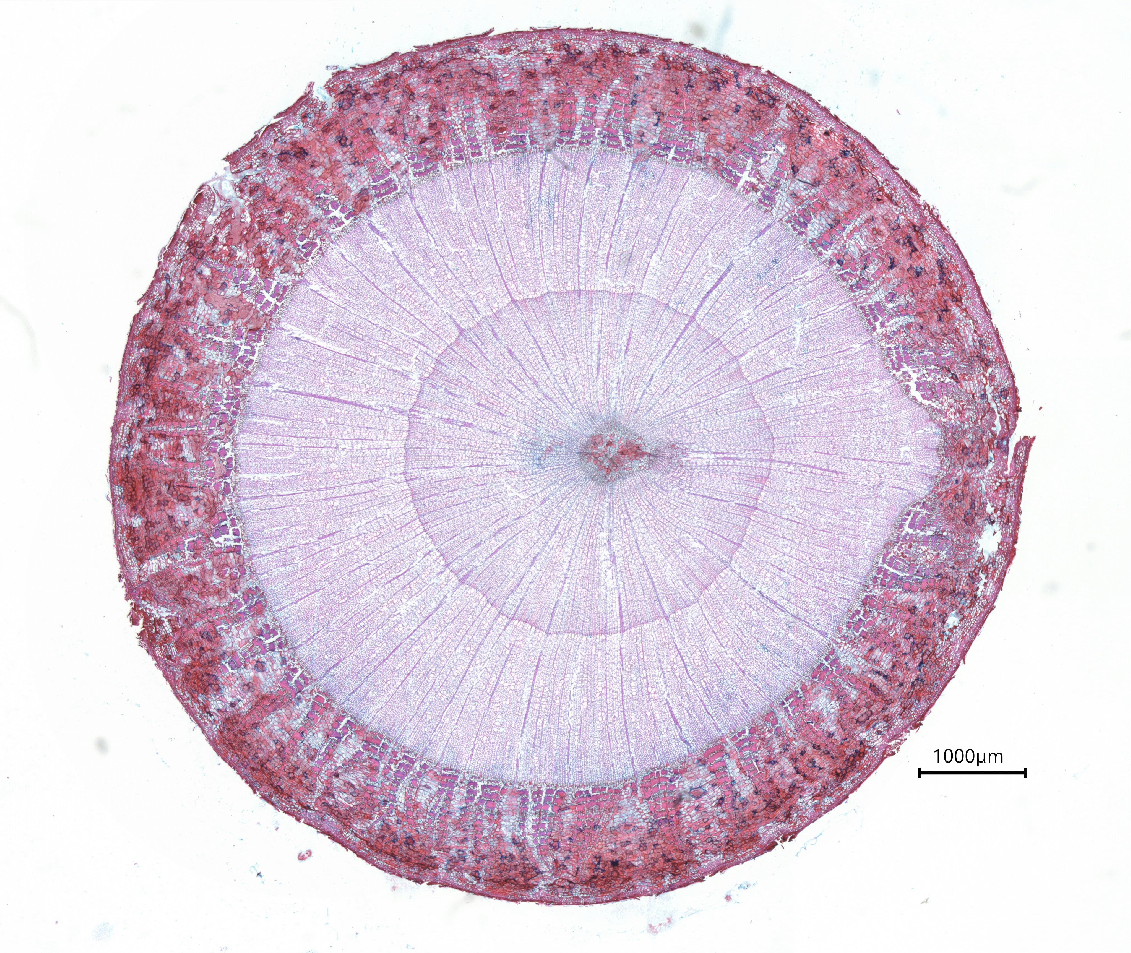
|
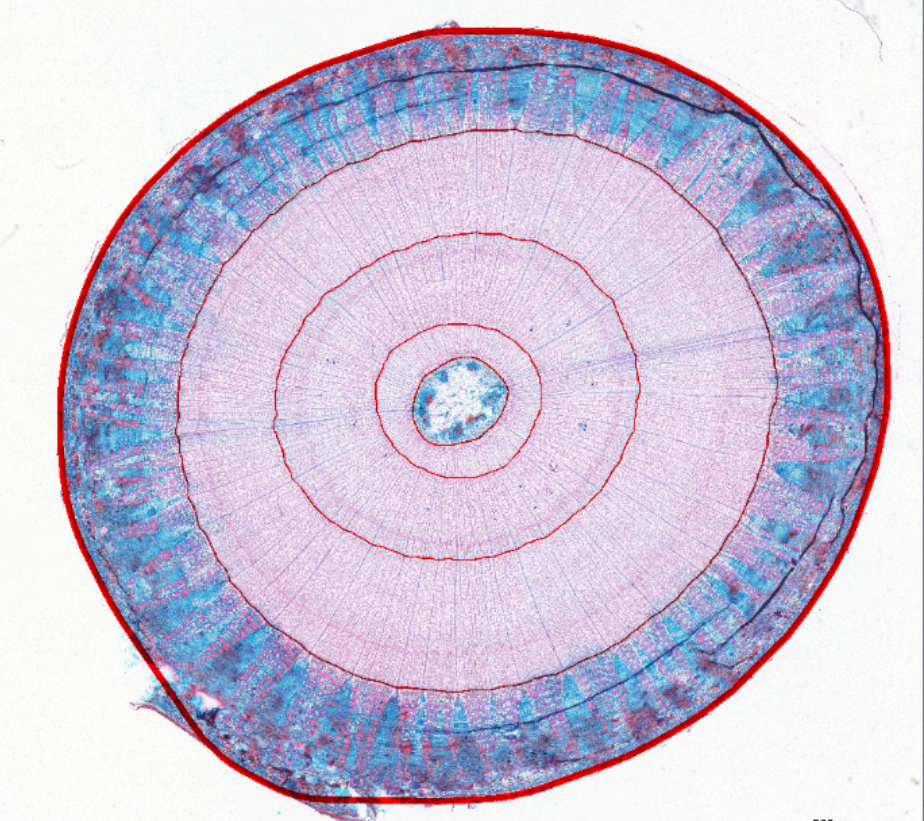
|
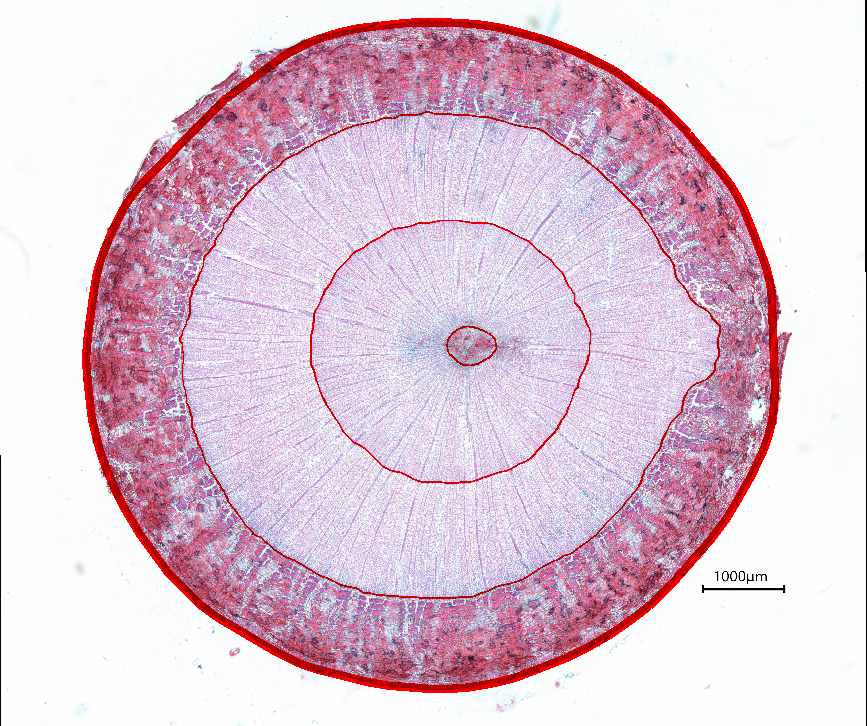
|
4. Workflow diagram

5. References
[1] Gillert, A., Resente, G., Anadon-Rosell, A., Wilmking, M., & Von Lukas, U. F. (2023). Iterative next boundary detection for instance segmentation of tree rings in microscopy images of shrub cross sections. In Proceedings of the IEEE/CVF Conference on Computer Vision and Pattern Recognition (pp. 14540-14548).